Showing posts with label roof ridges. Show all posts

Wednesday 25th October 2023

Worklist:
Continue painting factory.
Review and continue cottage painting.

Geoff continued painting the factory, building up layers of rust and old painted wall and roof surfaces.

Stephen had made a start of painting the cottages at home. Firstly, the gable wall 'roof flashings' had to be resolved, and a mortar fillet was chosen over the lead flashings previously investigated in the workshop. Secondly, the slates were painted using a pallet of white and black paint regularly replenished and mixed.


The end cottage and all of the chimney stacks were given a coat of sandy paint, to represent mortar. It was intended to then paint the stone wall of the end cottage, but Stephen chickened-out. Instead, after preparing a pallet of three earth colours, he used a finger to smudge the paint over the surface, with unbelievable effect.


The rest of the cottages were given a coat of matt white bathroom/kitchen paint, which happened to be handy. Again, the effect of the stonework grinning through fitted perfectly with the research from the previous week and saved having to remove some paint to suggest very old whitewash. A couple of cottages will be given a second coat to reflect better maintenance. The stone embossing stood out perfectly.


Geoff provided a pot of Railmatch Bauxite paint which was perfect for the terracotta ridge tiles and chimney pots.


Stephen went on to paint the ridges and fix the windows and door to the managers house.


Individual gutters and downpipes were fabricated months ago, but recent research often showed gutters discharging into neighbouring gutters with shared downpipes. However, the original gutters will 'probably' be used.

Wednesday 4th October 2023

Worklist:
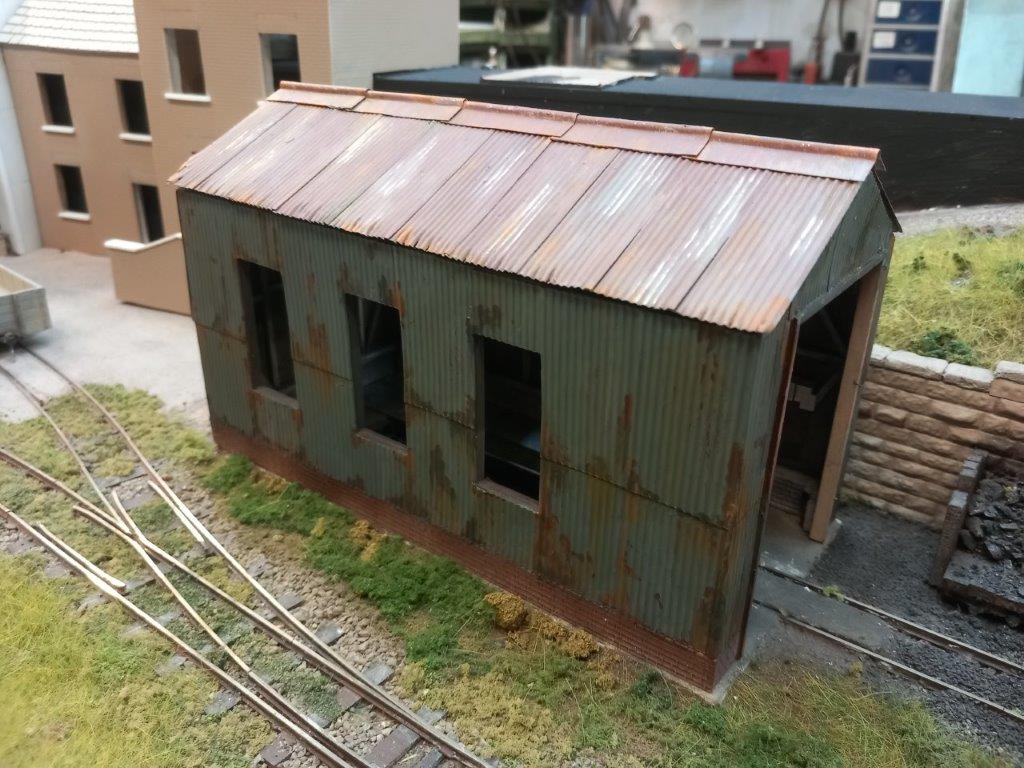
Create ridge sheets for the engine shed and fix to roof.
Paint roof.
3D print house windows and door.
Investigate roof to stone wall lead flashings.

Geoff made the engine shed metal ridge units from thin aluminium sheet and glued them in place on the roof that Stephen had made many months ago. 


Geoff had produced a set of double-hung sash window parts and a front door for the smaller brick building.

Upper and lower sashes are glued back-to-back.

The parts required a small amount of fettling to fit, but looked great once in place.


Stephen spent the session cleaning up the ridge tiles on the cottages, but moved on to researching the lead flashings that would be required on each roof abutment. Some modern-day materials solutions would save some time, but wouldn't be right, so a long session of work was inevitable.


After looking at the interior of the cottages the previous week, it was decided that some wallpaper might be nice on the few areas where walls could be seen (the tunnel behind cuts most walls off). After some research and prep work, a few contenders emerged.

They will also be used in the house at the bottom of the slope. What about the office? More research.....


Wednesday 13th September 2023

Worklist:
Tiling to the rear of the cottages.
Practice painting/weathering to engine shed.

Stephen continued tiling the rear slopes of the cottages. Once finished, a coat of dilute PVA was applied over all of the tiles to stabilise them.


Geoff had found an article on painting rust on rolling stock - fuel wagons in particular. The rear wall of the engine shed would be used for practice. After the dark rust base coat had been applied, lighter rust highlights were applied that were then dabbed with rubber solution. A grey topcoat was then applied over the whole area. Once dry, the surface was rubbed with a stiff brush to remove the rubber patches. The effect was similar to the wagons, but after reviewing various photographs of rusty corrugated iron cladding on buildings, a different appearance was noted. Different rusty paints were then applied by brush to achieve the vertical steaky rust effect. He'll wait and see how it looks after it has fully dried.