Wednesday 22nd August

Worklist:
Platform lamps
Water tower
Main building
Cows
Details

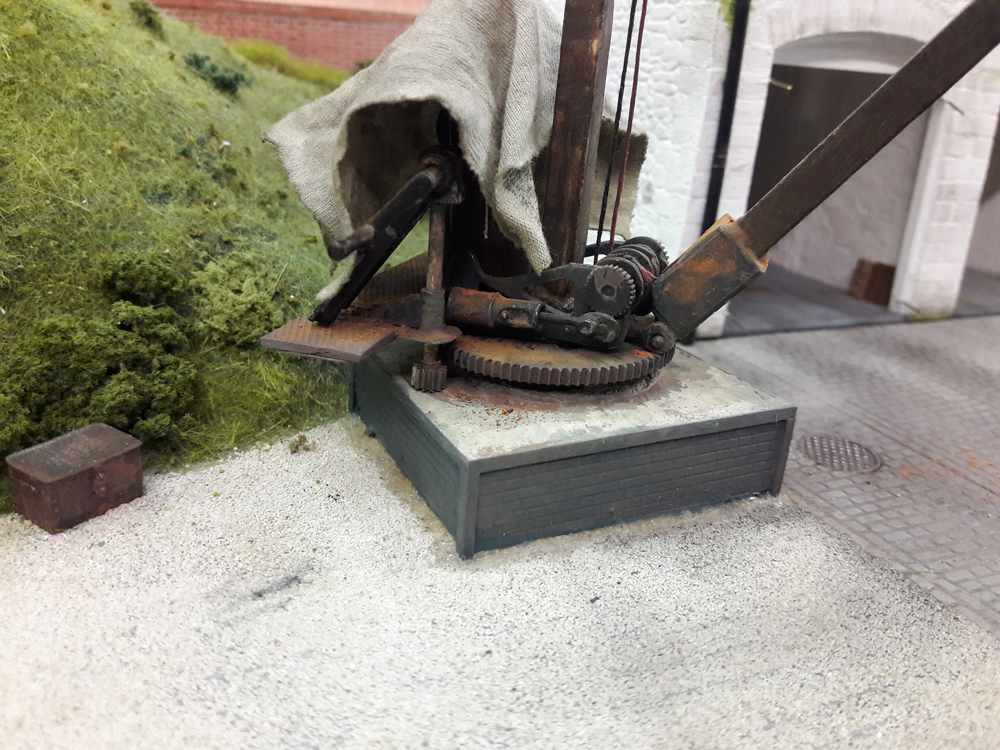
A full house this week. Geoff had painted the man working on the crane and added some tools. He claimed it was modelled on Laurence with hair, but Laurence seemed unimpressed.


For some weeks, Geoff has been mulling over how to convert a pair of S&D gas lamps to take 'micro' LED chips. One issue was how to get the pair of wires up to the globe.


Having exhausted more obvious solutions, he opted to make his own lamp body by turning one up in brass.


 Enamoured by the kits cross-member, it was cut off and transferred to the new column.


The beautifully detailed lamp fitting now has to be assembled and the LED integrated.....

Laurence completed the water tower roof, adding a ridge timber and capping strip.


He then moved on to making a new delivery pipe. First, the the old connection had to be drilled out.


The new pipe was started, using a piece of old cloth with a section on flexible plastic tube (heat-shrink) glued in the centre. This will be wrapped up and shaped in due course.

Stephen finally tackled the 'bolting-down' of the main building. The option decided upon was to glue lengths of studding into the end walls and bolt through the baseboard. A length of 4BA brass studding was sourced and two pieces cut off. First, holes were drilled down through the baseboard on the wall lines, then, with the building in place, holes were drilled up into the foam core of the walls. Once checked for fit, the studs were glued into the walls with quick-drying epoxy. Once dry, washers and nuts were fitted loosely, to be tightened up when the glue is fully set.The stairs were glued to the building together with a small timber store box to cover a timber locating block.  The unpainted ground around the stairs was coated with 'Yard Filth'. Weeds and clutter will be added later.


Geoff had given the two white metal cows a coat of white primer to match the 3D printed trio. The metal ones are a bit scrawny in comparison and will probably be fattened-up with a bit of filler. Placed at the top of the bridge path, they start to fill the space (and disguise the backscene junction nicely.


Geoff had also assembled a lovely S&D kit of an Ingersoll Rand mobile generator. Once painted, it is destined for the quarry siding, near the bridge.


Wednesday 15th August

Worklist:
Coal
Cows
Crane

Just Stephen and Geoff this week.

Geoff had finished making the coal sacks for hand-loading into bunkers in the loco cabs. Filled with coal and fixed on the coal staging with a club hammer, they added nicely to the scene.


Stephen hoovered-up the loose coal in the new staithes (with a stocking separator), then fresh coal was applied where necessary. He then brought out three cows that his friend Ian had 3D-printed for him. The drawing file, of a scanned cow, had been downloaded from a free website. Through trials, the cow was scaled to 1:43 using a set of measurements found on the web and two, slightly different sized cows printed. One was also 'mirrored', to look the other way. Due to the way the printer makes allowances for supporting the cooling plastic, the cows were printed, on their backs and sides to assess the effect. All options produced excess 'blemishes', which took some cleaning off, but all produced animals that would be suitable for the task of creating a herd disappearing up the bridge path.


The cows were given a couple of coats of plastic primer which took away some detail, but filled-in some of the ridges. We haven't decided on breed yet, so the white would be a base coat for Frisians or undercoat for Herefords - TBA.


This inspired Geoff to solder-up two whitemetal cow kits which had far better detail and 'character', mooing loudly - apparently. They will form the rear-guard of the herd.


Geoff had been looking at the crane and the steam engine in particular. He noted that a lot of piping and detail was missing, which would be laborious to rectify. It was agreed to make the crane a 'work-in-progress' project and to use a tarpaulin to hide the anomalies. He experimented with fabric and paint to produce the sheet. Damage to the corners of the brick base were noted and the addition of steel angle corner protectors were agreed, which Stephen worked on, giving the whole structure a repaint to reflect engineering brickwork.


The metal parts of the crane were first painted and then treated with weathering and rust powders, before the tarpaulin was 'tied down' with painted thread.


A figure was then found in the 'bits box' which seemed perfect for the scene, but he'll need a repaint first. (note the gloss black paint added to represent grease)


Geoff finished off the new footpath area, adding the shrubs and his signpost.


Geoff had been assembling and painting a Belfast sink, plumbing and a tap which, he said, would be essential for working the engine. These were now fitted on the adjacent garage wall.


Finally, Geoff got his 'Rust It' pack out and, after reading the instructions, treated a few metal parts i.e. knife sharpener, corrugated iron sheets etc.


Wednesday 7th August

Worklist:
Review Geoff's 'homework'
Coal staithes
Coal sacks
Grass

A full house this week and the first job was to review what Geoff had been up to - and he had been busy!

In the same way that we had modified the capacity of the main yard coal staithe, Geoff had looked at the loco coal stage again and decided it too needed to be bigger. The obvious way to do this was to this was to screw some corrugated steel sheets to the front! Then, he added a load of spilled coal on the ground and masses of ash and coal waste beside it.


A water tap and bucket would be handy. (Note the fence with its stiffening braces has been fitted).


A couple of signs had appeared, with beautifully small lettering which, on very close examination, turned out to be laser etched into basswood. The etching, on both sides, had actually created holes right through the wood, but these are only visible when light is viewed through them and nothing seems to have fallen out.


Some etched drain covers had been added to the main paved yard area. (The laser cut cardboard caravan is the 'temporary' office/ticket office/mess room etc.)


The modified seats had been painted and a new platform sign created. The letters, of course, are individually laser cut basswood. Geoff has been developing a 'railway-map world' around the layout based on the real area of Exton and Cottesmore (West) - just north of Rutland Water. More anon.


Stephen had previously cut, prepared and painted lengths of code 70 flat bottom rail and now glued them into place. As only a couple of short lengths were available, the internal sections were cut short in the knowledge that coal would cover the shortfall.


 The timbers were painted a pale, brownish-grey, then black weathering added over the top.


Some plasticine was applied and compacted inside.


 And finally, various grades of coal glued in place with PVA.


As part of his coal assessments and knowledge of on-board loco coal storage problems, Geoff set about modifying some Bandai 1/48 scale sacks to create some spare bags of coal. The handles were made of stranded wire.


The final job was to apply some electrostatic grass to the new bank. PVA was applied and long filament grass applied using a proprietary unit.


We've adopted the habit of going over the newly applied grass with a hoover, with a grass-catcher attachment, which lifts the grass while collecting loose material.


There's another sign to be 'planted' by the patch, and some shrubs along the whole bank.