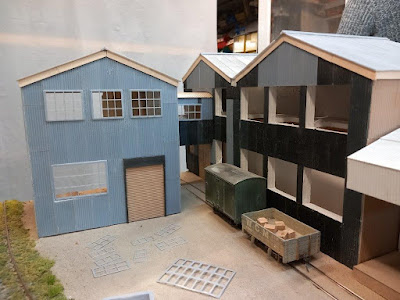
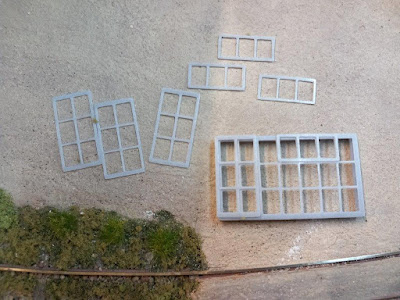
Wednesday 30th August 2023

Worklist:
Roof ridge tiles.
Window painting.

Geoff had produced a drawing of the ornate ridge tiles for the two 'smarter' buildings and now produced the files for 3D printing. First off were the two-hole ridges. The software automatically arranges the units on the printable area, which doesn't seem to have any logic, but saves time.


We were very pleased with the results.


Which looked great on one of the roof tops.


Geoff has had a yearning for a 'barley-twist' ridge tile for a while, and as the first tile had worked so well, he went back to the computer to produce his version. Trials of 9mm and 7mm long holed tiles were made, but 7mm was chosen. The barley-twist version was based on the 9mm tile.


They too turned out well, and although a little up-market for the workman's cottages, that's what we will be fitting. 


While Geoff routed-out the final glazing panels, Stephen carried out the final fettling of the windows openings. The final task of the day was painting the window frames white.


Next week we plan to start spraying the base coats on the buildings. We're torn between light grey/dirty white and rust. It will depend on what we can lay our hands on.


Wednesday 23rd August 2023

Worklist:
Review a prototype ridge tile.
Cut glazing sheet for windows.
Fix link unit to main building.
Fix the new floor and create a basic interior for the separate building (we must give it a name...).

Geoff had produced a drawing of a ridge tile based on Stephen's photo discussed last week. The angle was based on the cottage roofs as Stephen had taken the house/office home. The unit was approved, subject to possibly scaling it down a little. A review of the photo will be undertaken first.


The clear plastic/acrylic sheet is difficult to mark-out and very tough to cut, so Geoff resigned himself to a day of tedious and strenuous cutting-out of glazing panels for all of the windows. Firstly, the windows had to be measured.


Almost immediately, he had a brainwave - could the glazing be cut using the CNC router? The only way to find out was to try it. Measurements were taken and used in the CAD program to produce a cutting file for the router. 


The glazing sheet was screwed down to the timber base...


...and the first trial run set going. WOW!!!


Apart from removing small tangs that kept the pieces in place, the panels were perfect. More panels were measured and cut out. Extra fixing strips were added to keep the clear sheet flat, but it was a fabulous success.


The next part of the process is to paint the windows - white. Then superglue the glazing in and with weights to keep the frames flat, then cure them fully in the UV nail lamp.

Meanwhile, Stephen had decided to glue the link unit to the main building. At the same time, the final cladding panels were glued in place. While all this set, he made a thin card panel representing a pair of double doors between the link and main building, which will be fitted once painted. The main doors to the building under the link will be made from plasticard.


The ground floor panel fabricated for the separate building the previous week was glued in place. The building interior now came under scrutiny. Firstly, a 5mm MDF panel was cut for the first floor. 


The 3"x2" timber post inside (to fix the end backscene to) needed to be disguised. Foamboard partitions were designed and made, together with doors. 


The interior of the building needs to be decorated and details like furniture and delivered goods will all have to be made and finished, before everything is assembled. Maybe some lighting?


Wednesday 16th August 2023

Worklist:
More factory windows to be printed.
Mods to link unit.
Floor panel for the separate unit.

Geoff started printing the rest of the windows for the main building.

Stephen decided to fill in the rear window of the high level link unit. The rear aperture had started out as the window on the front, but little thought was given to the reveals. The link had then been reversed to enable a more suitable window to be created, which left the tatty window reveals exposed at the back. The window opening was filled flush with foam board and a layer of corrugated iron cladding applied to the outside, which is just visible along the backscene. A layer of white card was applied to the inside face to complete the job.

The constant shuffling of the separate building to locate the link unit led Stephen to consider how the separate building would be located and fixed down. A brief discussion determined that a full floor panel would be made to restrain the ends of the two sidewalls on the open face, which would also allow the building to be bolted down to the baseboard. Stephen cut two layers of thin, scrap MDF and plywood to size, glued them together and left them to set under heavy weights until next week.

The main building windows were loose fitted to get the full effect.


The remaining two smaller windows were also printed, but hadn't been cured before 'end of play'. Two sets of double doors into the main building, further down the track, will be handmade in plasticard.

The office/managers house roof ridges had been discussed since they were first designed. Something reasonably ornate but 3D printable had been sought ever since. A chance gaze upwards along a local row of houses found these specimens. Geoff will attempt to produce some in due course.


Wednesday 9th August 2023

No meeting last week, but there was interesting news to discuss - an invite to the Salisbury and South Wilts Railway Society model railway show in May 2024. Being 9 months away, a 6-board layout was more than feasible and would be a great test before the Birmingham show the following autumn.

Geoff had met another modeller at the TDMRC open day, who described the excessive cost of van hire for the over 70's, so planning for three-car transport was top of the list. Two friends, both experienced exhibitors, would be approached in due course. Two new trestles would be required, plus extra lighting, extensions to the fascia, backdrop etc. Our existing trestles were very bulky, but a trial strip-down showed that they could take up less space. A third, decent sized car should suffice. 

Worklist:
Discuss trestles (see above).
Print more windows.
Test the addition/fixing of glazing sheet.
Cut-out remaining openings.

Firstly, the remaining windows for the separate building were printed and popped into place. We were very pleased with the effect. The glazing bars of the larger windows were found to be bowing outwards, which would not be acceptable when the glazing is applied. 


As they hadn't been specifically cured, an off-cut of glass was cleaned and the window units pressed flat while they had a few goes under the nail-bar UV unit. They came out flat, but now needed to be paired up with some glazing sheet to see if they can be stuck together. Geoff did a trial run and used superglue to bond them. The usual 'fogging' of the glazing occurred, but a few drops of 'anti-fogging' were applied. We'll see how they are once dry. Fortunately, we are not looking for clean windows - quite the opposite, so this shouldn't be a problem.


Meanwhile, Stephen started cutting out the rest of the window openings. It was decided to install floors, however minimal, so that different effects could be achieved in the separate spaces e.g. lighting?


Plain 'metal' infill panels were fitted between the ribbon windows (covering the 'steel frame' behind!). They will all be measured and new windows printed in due course, although it was noted that Geoff has spent a fair few weeks on the printer and is due a spell of railway modelling for a change.


Geoff moved on to drawing and printing the opening casements. Slightly wider horizontal and vertical frames will be laid flat or slightly ajar, with the underlying glazing bars removed, to create opening windows. They looked quite flimsy, but came off the 'build plate' easily.


As we have a large number of tests, failed and surplus window frames, the idea of making the separate building a sub-let unit a bespoke window frame maker could be a great choice!

Stephen had been working at home on the house & office buildings and brought them in for a 'fitting'.