Building sign - review artwork, create waterslide transfer and apply signage.
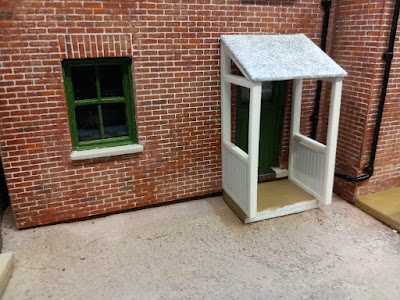
Review new porch parts and assemble.
Finish pipework assembly and make good grass and foliage.
Fit engine shed windows.
Geoff had produced some artwork for the sign, which included some rust patches and a border. After printing onto waterslide transfer paper and trimming to size, the transfer was applied to the building. Microsol liquid was then applied all over the transfer to help bed it into the corrugations and over the bolt heads.
 |
| Note the bolt heads under the transfer. |
Stephen had remade the porch components, but needed to check the width of the door cill. Once confirmed, the parts were assembled, ready for painting. It is still an option at this stage and will be reviewed again, as the area develops.
The new paving in the area was discussed. One option was to lay stone slabs onto the existing 'gravel' surface, with a kerb along the front edge, providing a pedestrian area. The other option was to have paving flush with the road thereby suitable for mixed traffic, maybe stock for collection. The foam layer underneath would make the latter feasible.
Left: The hidden track that runs under the buildings from the tunnel on the main station board. This is the Quarry line. Wagon loads of 'empties and fulls' (crushed stone and stone slabs), come and go on this line via the main station area.
Middle: The stonemasons private siding. The bulk stone materials come here from the quarry and the finished stonework goes on down the line for distribution.
Right: Is the 'mainline', to and from the main railway network.


