Showing posts with label Ballasting. Show all posts

Wednesday 30th September 2022

Worklist:
Make and fit brackets for the control panel.
Carve the scenery foam on exchange board #4.
Apply paper mache over foam.
Review results of new roadway plaster method.

Laurence fighting a mouse invasion at home this week, but he's promised to come next week. (Yes, we do believe him on both counts).

Geoff had been hunting for some aluminium angle to make a pair of brackets for the 'Local' control panel (Masons Yard), similar to the main panel. Having drawn a blank, a flat plate was suggested and a suitable 3mm rectangle quickly found. After a detailed discussion regarding fixings, panel and bracket positions, the plate was cut to size, cleaned up, clamped together and drilled. One key issue with the brackets is that the have to allow the panel to be fitted on both sides of the layout - one side for use in the workshop, and the other for if we ever get to exhibit all 6 boards at a show. Final positions agreed, holes were drilled in the both sides of the panel and baseboard. The plates are fixed to the panel with 2 x 6mm hex bolts with tee nuts on the inside of the panel. A single 8mm hex bolt fixes each plate to the layout, also using tee nuts. The array of drills for pilot holes, bolt clearance and tee nuts often caused confusion and two heads were definitely better than one!


Workshop format - the normal panel position.
Slightly overlapping the fiddleyard board.

Exhibition format location. Central to both scenic boards and fiddleyard.
(Hidden run-through to fiddleyard in foreground).

We haven't decided on the exact method of supporting a backscene for exhibitions, but we always bear it in mind and are happy that there is space for some form of framework.

The view from underneath.

Geoff then attacked the scenery foam glued down the previous week with a serrated knife. After hoovering up debris from this and that left over from the tie-bar ballasting, the track was cleaned ready for a full test the following week. However, a blade on another point failed to convey electricity. Geoff had used a new method of fabrication to obviate what he considered a visible wiring issue, but each of the points has required insitu modification - much to his frustration. When fixed, a successful running test was completed.

While this was underway, Stephen applied newspaper strips with diluted PVA over the scenery foam and integrated some of the usual brown water colour paint into the final PVA coat.


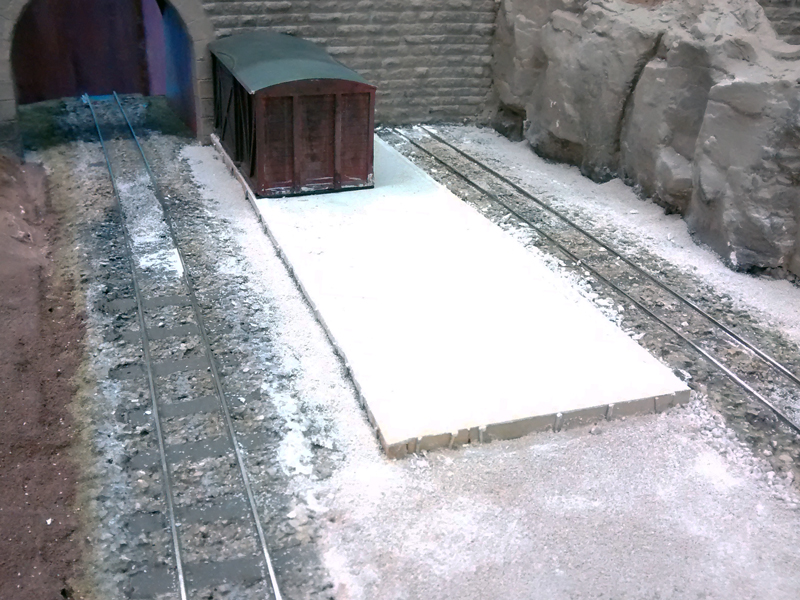
Finally, Stephen took an offcut of aluminium and a sandpaper block to the area of roadway plaster he'd applied the previous week. Rather than gluing chinchilla dust to a plaster base (as before), he'd made a mix of the two. He was now able to easily scrape the hardened mix to the required levels while maintaining the required surface finish. Pleased with the effect and ease of use, the areas will be extended in due course. A shaped tool may be made for use on the check rail sections. [NB  The check rails are code 90 rail set inside the Peco code 100 track. This will allow a cleaning block to pass over the check rails and infill undamaged]. 


Wednesday 21st September 2022

Worklist:
Check newly ballasted points are free to move.
Ballast areas around tie bars.
Experiment with new roadway mixture.
Fit new edge profile to transition board.
Glue foam for landscaping on transition board.
Discuss control panel fixings.
Discuss testing of full exhibition layout in a straight line!

The blades on the three points were teased back into working order following ballasting last week. Geoff then carefully applied ballast around the tie bars. The track will be over-sprayed to homogenise the ballast colour and add some oil and dirt.


Stephen was still concerned about the masons yard roadway finish. On the main station board, chinchilla dust had been glued with PVA onto the plaster road base, which was smooth. The masons yard road crossings had been created with different height rails to ensure that the running rails could be cleaned without scraping the road check rails and infill. However, gluing the dust between the checkrails had been attempted twice, with poor results, and the lumps could not be reduced in height without removing the dust/texture. Stephen removed the 'lumps' and decided to excavate the plaster a bit deeper, then apply a mix of fine plaster with the dust mixed in. This should allow the height to be reduced without losing the texture, but an inspection next week will show if it works.


Some more of the white faced 6mm MDF was unearthed, cut to shape and glued into place along the board edge. Foam blocks were prepared and glued into place. These will be shaped when set.


An extensive discussion took place on how to fix the local control panel to the baseboard. One key aspect to be considered was the fact that the control panel needs to be fitted on both sides. Schemes included tubes and pipe brackets, end angle plates like the main panel and the like. No decision was made, but the discussion confirmed the need to test the new boards thoroughly, in order to determine position and height. This led to another discussion - could we test the straight exhibition configuration in the workshop? The total length was 2 x 1140mm + 4 x 800mm = 5480mm. Stretching a tape measure to 5.5m led initially to a diagonal arrangement, with Worton Court supported over Geoff's workbench on two short legs and the fiddleyard diagonally positioned in the doorway through to the front garage. This would require an extra trestle to be made - just a simple pair of non-free standing legs. Slight variations in direction edged the layout around until the layout was almost exactly in its usual position, with one end on the storage unit shelf, and no extra trestles required!!!


Although eager to test it out asap, we will complete the basic scenic work and clean up the yard area track first and hopefully have a go in a fortnight?


Wednesday 14th September 2022

Worklist:
Test uncouplers.
Start ballasting track.

Laurence still on family leave, so just two again this week.

This would be a full loco-powered test rather than a hand shunt exercise, so the layout needed to be set up for running. The first transition board (Quarry line tunnel mouth) would also be required for access to the engine shed siding.  Once set up, a loco, two wagons and a van were used to successfully test the magnets without any adjustment. The movement wasn't excessive, but it was more than enough to uncouple. The exercise did highlight the need for an overhaul of some couplers - one of those 'Roundtuit' projects.


It was then decided that ballasting the track was probably the next task - why not. Three tubs of different coloured ballast were retrieved from a storage box. The original Cottesmore trackwork was ballasted with a material used by British Airways to soak up oil spillages in their workshops (care of John). Cat litter had been tried, but (according to collective memory), it wasn't quite as good. The three tubs we had were different colours, possibly down to Stephen, who had experimented with colouring and blending ballast for a project. As the ballast would be dirtied/over-sprayed later, colour wasn't an issue. Size was, and we needed to sieve them first, but without a sieve, we improvised. Stephen's yoghurt pots to the rescue. A pot had holes drilled in the bottom for the maximum size required. Another with smaller holes - minimum size - and the 'fines' were also separated. It took some time, but the sound was pure Caribbean and we had quite a collection in the end.


Geoff mixed Screwfix PVA with water and filled a small applicator bottle. Instead of adding washing-up liquid to counteract surface tension, he now uses IPA Isopropyl alcohol, delivered via an atomiser. We started off with one tub of ballast, then sieved another tub and used that, and ended up using the third tub. The ballasting was completed on all three boards except for the tie-bar areas, which will be ballasted with care, in due course.

Dry ballast adjusted by brush.

IPA applied before diluted PVA.

A finger comes in handy as well.

Gaps left around tie bars where more careful application is required.


The photo below looks odd, but it's just those curved tracks tricking the eyes. This transition board will never be seen at an exhibition, as it will only be used in the workshop. The handed version (The second engine shed) will need ballasting as well, if we can scrape any together from somewhere!


Wednesday 15th June 2022

Yard road surface.
Board #4 ballasting.

Nice to have a full house again.

After a discussion about how to make-up the yard level to allow the roadway dust to be applied just below rail level, it was decided to cover the foam sub-base with thin card - probably two layers. Stephen got started cutting out the pieces and had the first section glued and weighted down before we broke early due to the heat. 

Geoff decided to ballast the mainline track on board #4. The ballast we use harks back to John Langridge days. John worked for British Airways engineering dept. and brought home leftover granules used for soaking up oil spillages. The tub we are still using had some larger than needed lumps and needed sieving. No suitable sieve could be found, so a yoghurt pot had holes drilled in the bottom, which were made larger until the correct maximum size was achieved. In a change to previous applications, a mix of water and isopropyl alcohol was used to wet the ballast. Geoff had picked up this technique from some of the numerous American YouTube videos he watches. Finally, slightly diluted PVA was dribbled over the ballast. We'll see what difference it makes next week.

Placing the ballast with a paint brush.

Sieving the ballast.

Wetting the ballast with diluted IPA.

Dribbling diluted PVA.

The quality control manager 'on the job'.

The heat had finally got to Laurence and the shorts had come out!


Thursday 23rd June

Worklist:
Gas engine detailing
Fence extension
Coke storage

Due to flooding the the South East, Stephen was two hours late, but the other two pressed on in silent bliss!

Geoff carried on adding fittings to the engine using both plasticard and brass. Once a satisfactory level of detail had been achieved, he began painting the model. First a base of green, then the wheels in red. Wearing surfaces will be cleaned to bare metal, in due course.


Laurence continued to work on the extension to the platform fence. Having applied brass strip post-reinforcements the previous week, a coat of paint was applied. Then, having painted it a different colour to the existing fence, that was repainted to match the new section.

Stephen continued to assemble some cut-down sleepers to form an enlarged coke storage area. Super-glued together and re-stained, metal strapping was added and the unit glued in place.


Stephen had brought a small pot of ballast he'd prepared for a Gn15 line, using Cornish grit mixed with neat acrylic paint. It was a grey/brown colour which, he understood to be ideal for coke, but a discussion on the actual nature/colour of coke ensued resulting in a need for further investigation!


Thursday 5th May

Worklist:
Yard and road finishes
Platform and surrounding area finishes

Laurence was on nautical duties so just two.

Geoff continued with the yard by fettling the cut joints between panels of plastic setts. First, a tool was made with a double-edged blade, like a scraper-board pen. This enabled the raised edges (which were clearly annoying Geoff) to be removed. In the end, a centre punch proved much more useful.

Pre-cleaning panels - the gaps had to go!


Foam inserts and then paper mache were applied to the edge of the road.


Stephen applied a layer of Smooth-It to the platform. It is quite sloppy, as recommended, which makes levelling interesting.


The van body chosen to provide a a secure/dry store on the platform was cleaned up and the base repaired. Dropped on after the plaster had dried, it looks the part.


Stephen then looked at the test panel of chinchilla dust Laurence had applied the previous week. None of the gloss cream paint was visible and the surface looked very good albeit a little too regular. Random sanding worked well, to make the surface more realistic.

Chinchilla dust, as applied
Chinchilla dust given a light, random sanding
Here, it's used to fill the areas next to the track ballast.

Following a discussion the previous week, Stephen had brought down a Corgi Bedford OB coach he'd bought over 20 years ago. It's 1:50, but this works well in the small space. It's not Geoff's favourite coach on the basis that it wasn't the most common model, but it works well. It's for the excursions that are starting to run to the embryonic preserved railway.


Missing from last week was a photo of the coal yard, which was given a coat of 'Yard Filth', made by Green Scene.


To 'finish off' the yard, Geoff applied a mixture of weathering colour.


And finally, we had a lot of PVA left over from the paper-mache work, so the hill got a dusting of green texture.


NB: the chinchilla dust has previously been attributed to Iain Rice, but it actually came from Gordon Gravett's excellent book on scenery.