Showing posts with label Edgings. Show all posts

Wednesday 21st September 2022

Worklist:
Check newly ballasted points are free to move.
Ballast areas around tie bars.
Experiment with new roadway mixture.
Fit new edge profile to transition board.
Glue foam for landscaping on transition board.
Discuss control panel fixings.
Discuss testing of full exhibition layout in a straight line!

The blades on the three points were teased back into working order following ballasting last week. Geoff then carefully applied ballast around the tie bars. The track will be over-sprayed to homogenise the ballast colour and add some oil and dirt.


Stephen was still concerned about the masons yard roadway finish. On the main station board, chinchilla dust had been glued with PVA onto the plaster road base, which was smooth. The masons yard road crossings had been created with different height rails to ensure that the running rails could be cleaned without scraping the road check rails and infill. However, gluing the dust between the checkrails had been attempted twice, with poor results, and the lumps could not be reduced in height without removing the dust/texture. Stephen removed the 'lumps' and decided to excavate the plaster a bit deeper, then apply a mix of fine plaster with the dust mixed in. This should allow the height to be reduced without losing the texture, but an inspection next week will show if it works.


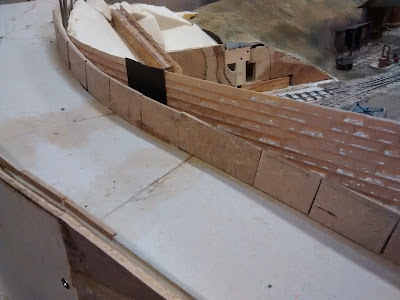
Some more of the white faced 6mm MDF was unearthed, cut to shape and glued into place along the board edge. Foam blocks were prepared and glued into place. These will be shaped when set.


An extensive discussion took place on how to fix the local control panel to the baseboard. One key aspect to be considered was the fact that the control panel needs to be fitted on both sides. Schemes included tubes and pipe brackets, end angle plates like the main panel and the like. No decision was made, but the discussion confirmed the need to test the new boards thoroughly, in order to determine position and height. This led to another discussion - could we test the straight exhibition configuration in the workshop? The total length was 2 x 1140mm + 4 x 800mm = 5480mm. Stretching a tape measure to 5.5m led initially to a diagonal arrangement, with Worton Court supported over Geoff's workbench on two short legs and the fiddleyard diagonally positioned in the doorway through to the front garage. This would require an extra trestle to be made - just a simple pair of non-free standing legs. Slight variations in direction edged the layout around until the layout was almost exactly in its usual position, with one end on the storage unit shelf, and no extra trestles required!!!


Although eager to test it out asap, we will complete the basic scenic work and clean up the yard area track first and hopefully have a go in a fortnight?


Thursday 14th April

Worklist:
Road construction
Workshop

No Laurence this week as he had a major financial transaction to complete.....

Stephen spent 20% of the time cleaning up the walls of the workshop and the rest of the time watching Geoff build a road along the newly completed wall.


The road would be our first use of Smooth-It - a form of fine plaster that is widely used in the construction of roads for 'controlled' vehicles, mainly in OO/HO, and made by Woodland Scenics.

Instead of the recommended foam strip, a thin timber 'kerb' was glued around the area of road to be formed. This contains the plaster and forms a guide for levelling. As an added process, PVA was spread on the card base.


The recommended mix is quite sloppy, but, as a trial, Geoff made the mix a bit thicker. The shape and angle of the first 'pour' meant that smoothing the surface using the kerbs wasn't easy, but an acceptable finish was achieved.


We were quite happy to see a few imperfections as it gives us the opportunity to try out a few techniques described in a book Geoff bought a while ago.


A much thinner mix was prepared for the main are where the kerbs could be used, and Geoff was much happier.


We have accumulated various sheets of embossed plastic setts and paving, and wanted to use them in the goods yard. Deciding which to use and how to lay it required considerable thought about the 'history' of the yard. We ended up with edged, path sections cut into strips, running away of the buildings and plain setts/tiles in the building. A sheet of 2.5mm MDF was glued over the whole area to get the levels correct.


This is how Smooth-It is supplied.


Wednesday 4th March

Worklist:
Progress sleeper wall detailing - L
Progress stairs to water tank - G
Progress gas house gantry, tunnel mouth(s) and bridge road surface - S

Laurence had permission to leave early this week, but he was still able to finish adding the steelwork to the mine track sleeper retaining wall. An epic construction!


Geoff started the painstaking process of applying brick sheeting to his side walls for the stairs to the tank. The walls have a ply core of the correct width to suit the '1-1/2' brick wall (13.5" wide). Just as the gas building wall, he used stretcher bond to the top and the sides of the brick-on-edge capping, then Flemish bond to the sides. The capping's had the edges filed off to produce a small bull-nose, but then had to have the rounded edges filed to reinstate the joints. A handrail will be fitted to one side of the stairs. What a job!


Stephen applied two coats of matt white paint to the amended gantry structure. This should provide a better scenario for the equipment it surrounds, especially once lighting is installed.


Stephen had produced a set of individual card stones to form the surround to the main tunnel mouth, and these were glued in place. The gaps between the plastic, stone sheet and the arch were filled with plaster, together with any other gaps or surfaces that presented themselves!


A simple plaster surround was applied to the mine tunnel mouth, which will be scribed in due course.


And finally, the road was given a rough coat of plaster to simulate a rutted track. It's going to need a lot of work, but its a start. (At least the cardboard has finally gone!)


Thursday 12th February

Stephen was on holiday this week so Laurence & Geoff decided to take things quietly. (While the cats away etc. etc.)

Laurence had been building the retaining wall on the entrance to the Worton Court Mine line.  All the timbering had been erected a couple of weeks ago so it was now time to fit some of the reinforcing channel to hold them all prototypically in place.  This consisted of Plastruct 'I' beam and some 1:48 scale 1¼” diameter bolts; the latter representing the rock bolts which would have held the whole structure to the rock behind the wall.  We had some discussion about whether to use channel section or I beams, but as the channel would need to be made by filing the rear two ribs of the I beams we took the easy route.  Spacers were fitted in strategic places on the rear face so that the beam could be glued (Thixofix) to the wooden uprights.  Bolt holes were drilled with a 0.8mm drill in a pin chuck and then Butanoned (?) to the beam.  Basic painting followed, however this will be suitably enhanced with rust and detritus once all the beams are fitted.  Eventually there will be two rows of beams.


Following some work on a friend’s layout Geoff decided to try out some paper maché for the scenery base.   The advantage of paper maché is that it is light, hard and can be glued easily to the edge of a baseboard (or anything else).  No more problems of plaster bandage (Modroc) coming adrift, cracking or becoming chipped. We used two parts PVA glue and one part water, plus lots of small pieces of newspaper.  This was applied as a test section along the edge of one board.  About three or four layers of newspaper was all that was needed.  It dried hard enough to sand in about four hours. It will be given a coat of brown paint in the near future before receiving its scenic dressing.


Geoff decided to continue his construction of a retaining wall behind the rear corner of the gas works. The core is laminated from plywood and card to get the correct two brick thickness when clad with Slaters’ embossed Plastikard.  Flemish Bond was used for the sides and the capping was cut from Stretcher Bond.  Once all the pieces had been cut out the sides were stuck to the core using Thixofix, then the caps were fitted.  It was at this stage that we discovered that the coursing is not regular and the mortar lines could only be approximately married up.  Finally a wash of Butanone was applied to the joints and the whole assembly clamped up while we took lunch.


After lunch the caps were filed round to represent bullnose capping bricks.  Then a very fine knife edge needle file was used to cut the mortar lines on the edges.  If anyone looks very carefully you can see that the courses don’t always line up, but it’s almost unnoticeable.  The bullnose bricks were painted bluish grey and once dry, white matt Humbrol basecoat was painted on and then immediately wiped off with a piece of kitchen roll.  It seems to have come out well.


Thursday 29th January 2015

Worklist:
Progress the goods (transshipment) shed.
Progress the retaining wall.
Progress the bridge stonework.

Well, this week we made great strides in completing our individual projects...

Stephen finished off gluing panels of stonework sheet to the remaining (visible) faces.


Then there was a pondering, long and hard, as to what the bridge copings could be made of, before Geoff whipped out the router and rounded off the edges of some 6mm MDF strips. Stephen then cut them to length, cleaned them up and glued them on top of the wall.


We knew what we were trying to achieve, but it was still very satisfying to see the finished result.


Laurence finished installing the timber baulks for the retaining wall, and it really looks the part now. The steel-section ground anchor rails need to be applied now.


Geoff made up and fitted some gutters and RWP's. The painting of the corrugated roof sheeting was then progressed; silver for the new, galvanised sheets and edge trims, and 'fiery' rust for the existing sheets.


Thursday 11th December

Worklist:
Platform surfacing.
Fuelling station.
Board edging.
Yard development.
Water tank adaptation.

Geoff experimented with some proprietary ash ballast, to give the platform some texture. Strictly speaking, the test was on the adhesive base for the ash. Three 'glues' were tested - 3M Sprayfix, PVA and matt varnish. A layer of matt varnish (slightly thinned) was applied to the plaster fill, to seal the surface, but the jury is out on the glue, until next week.

Stephen was keen to review the yard area, following discussions on the extent and type of roadway that might be employed. The part-finished store was positioned to define the spaces in question. Geoff & Stephen quickly determined that an extension to the adjacent slope could run-up close to the store, leaving a space for a lean-to storage area. Some foam was cut roughly to size, which has a splayed end, and fitted the bill nicely.


The discussion then took an interesting detour, when Stephen related his re-viewing photos of the original layout and recalled the water tower that stood at the end of the platform. The tower was found and positioned, and thoughts turned to a refuelling station (coal & water). Various locations were discussed - primarily, both ends of the platform and the head shunt. It was finally agreed to place the coal stage on a raised platform where the tank had originally stood (first photo below), with the tank moved closer to the end of the platform. This location was sloping ground, which could be made level, but keeping the small mound and forming a solid base on top seemed a better idea; the coal stage could be a raised timber affair with the slope extended underneath.


The features were roughly located and the clearances tested.


The two boards had differing back edges that we had known needed to be resolved. The new fuel station provided the perfect solution, by cutting away the rather dilapidated edge on the existing board and replacing with a continuous solid timber front piece.


Stephen took on the edging and Laurence was deployed on water-tower adaptation duties.


The small mound now extends right across the board joint and runs into the upstand Geoff had formed a year ago - 'just in case'!


The resulting ground line is extremely pleasing, and blends with the curve of the track perfectly.


Wednesday 12th November

Worklist:
Bridge - parapet walls, facing stonework.
Tunnel - retaining wall timbers, facing stonework.
Platform edging.

A two-pronged attack on the bridge:-

When fitting the road surface, the natural contours of the block supports was followed, to take advantage of the undulations. However, we agreed that the parapet height, should be constant off the road surface, so Geoff produced small sections of card and MDF to the agreed height and glued them in place. As well as fixing the height, the additions will increase the core-thickness of the wall to give an overall, finished thickness of just over 18", once the plastic stonework is applied.


We also decided that the coping will be a bull-nose section, flush with the faces of the wall (i.e. no overhang). A suitable section will be sought/manufactured - probably in timber, or MDF.


Stephen applied himself to the stone face sheets and was pleasantly surprised to find that the pattern repeated itself. After some judicious cutting-out, a backing strip of plasticard allowed two sheets to be joined and cut to shape. Discussions took place on the design of the arch edging stones. A Google image search provided excellent prototypes and a clean stone edge with wall stones trimmed to suit was agreed. (Watch for developments).


The tunnel mouth stone sheet was cut to shape. However, the narrow piers either side of the opening didn't lend themselves to the same treatment, but a similar arch sitting on plain stone jambs was a perfect alternative.


Laurence took another batch of 'sleepers' and progressed the tunnel mouth retaining wall. Before he started, Geoff got the belt sander out and flushed-up the montage of timber base-work. An interesting effect was achieved, soon to be covered up.


Laurence also returned to the platform (not before time!) and glued the edging stones into place. We were all surprised how it brought the platform to life.


The centre will have a skim of filler applied and (possibly) a sand finish.


Unfortunately, Blogger 'Lightbox' has ceased to display the images in the usual manner. We think it's a system fault, but we'll keep looking for a solution.