Wednesday 21st December 2022

Worklist:
Review the printed masons building windows and assembled high level walkway unit.
Glue the two sections of cottages together.
Continue making the loading/unloading building.
Paint the edge of the quarry and continue painting the water.
Paint the engine shed floor.

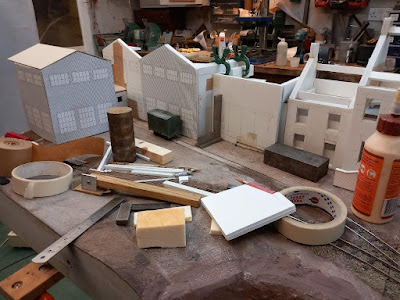
Two different sized elevations had been created using just two window designs. This will simplify the 3D printing of the windows. It was agreed that a door would be incorporated into the middle of the left hand building. (See later).


Stephen had been working on the cottages at home, but brought the two sections down to ensure that they accurately aligned with the scenery before they were glued together. 


Geoff mixed up some earth-mix and coated the banks of the quarry.


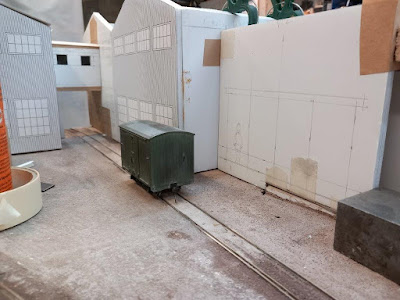
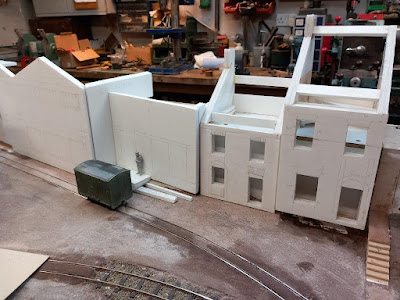
Stephen moved on to constructing the shell of the loading-bay building. This will be independent from the adjacent buildings and include parapets, a flat roof and possibly other features like a tank room. 


The engine shed floor was given a coat of concrete coloured paint and then heavily dirtied.


The whole backdrop of buildings are looking quite effective.


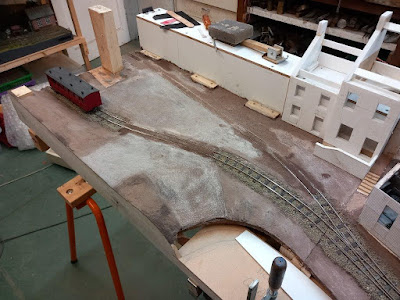
View from the fiddleyard.

Wednesday 14th December 2022

Worklist:
Review new factory building shells.
Progress quarry water feature.

Stephen had progressed the factory buildings using the Westinghouse photograph found the previous week. Large windows in a corrugated iron clad structure.
 

The position, size and height of the connecting gallery was investigated to assess how the unit could best obstruct views into the fiddleyard.


Finally, the area between the factory and the houses needed to be resolved and the loading dock idea was again discussed.

Initial loading dock investigation.


A free-standing, flat roofed building with a parapet on all three sides won the day. The roof will probably include a structure such as a plant or tank room. The loading dock will be dual-purpose, serving road and rail vehicles. The dock height will be set by the lower wagon floor level. A pair of sliding doors will fill the front wall, which also be clad in corrugated iron. [We could also add a roof!]. 

The two houses/offices will be shuffled forward a bit. The un-natural size of the principle house (in comparison to the factory) still concerned Stephen greatly. Measures to reduce the bulk/height were discussed and will be implemented. 

Meanwhile Geoff prepared and fitted a spacer strip along the top edge of the tunnel roof to provide a flush, vertical support for the backscene. A profiled ply panel was also made and fitted to the scenery area above.


He then moved on to the quarry. The packers were removed and the rigid foam edging was carved into a rocky edge. 


He then decided not to use the MDF panel as the water base, but cut out a new base from some old perspex sheet. He then experimented painting the underside a murky grey-green colour with a greener edging area. Experiments to use resin or paint for the top surface will follow.


Wednesday 7th December 2022

Worklist:
Touch-up areas of ground texture/paint.
Work on edge of water (flooded quarry).
Discuss stonemasons building type.

The areas covered with the 'gritty' paint were reviewed, sanded, tidied up and any gaps recoated. On the whole, the effect was good.


Geoff started working on the water feature - i.e. the flooded quarry. This hole spans the two boards and will have a single removeable panel comprising a painted board with a clear resin topping. For now, Geoff tidied up the edges and fitted thin plastic spacer strips around the edge of the hole. XPS foam was then cut into slices that filled the gap. Pieces were cut to size and glued into place around the edge. This will form a cushion between the sliding insert panel and the edge.


Once dry, the foam will be carved to form the quarry edge.

The archway over the mainline as it goes onto the fiddleyard was discussed. It was agreed that pipework was the best choice, possibly with a metal walkway and simple balustrade. This would span from a pier over to the building, with a structure against the building, which would reduce views into the fiddleyard to a minimum. Geoff  used a coach to set a maximum structure height over the track to 80mm. 

This led to yet another discussion about the masons building. Floor levels were discussed, as much to establish any consequences for rack storage. Initially, 10ft on the ground floor and possibly a bit less at first floor was proposed and marked on the cardboard structure previously prepared showing that the mock-up was quite tall. Details were again discussed. Flat or sloping roofs, gutters or parapets, hips or gables, stone or brick? We retired for lunch, over which Geoff described an industrial building he'd long admired - the Westinghouse brake and signal factory at Chippenham, which we searched for online. There was one particular image that jumped out:


Photo source

It had two-storey, gable-ended buildings with flying walkways, corrugated iron cladding, symmetrical and north light roofs, corrugated cement/asbestos roofing. Virtually everything we had discussed apart from the blue cladding and some ugly windows, but these were part of a real building and could legitimately be included. There were also plenty of details there for extraction. It all fitted the type of building we were trying to achieve. Stephen would take the cardboard building home and amend it to suit the agreed floor heights and the Westinghouse photo details. Did we finally have a building? Something like this?


To the right of the masons building is a gap that we always thought of infilling with something interesting. One evening, walking back to a friends house in Reigate, Stephen came across this building. A lovely combination of materials and a perfect state of decay!


Thanks to Google Streetview for these images, but we will probably do a photo-shoot some time.


Wednesday 30th November 2022

Worklist:
Finish new fixings for end backscene panel.
Apply road/earth finish.

A few weeks since our last meeting - life just gets in the way sometimes!

The end backscene panel required a new central hole to replace the hole cut out for the new siding track. Panel sockets were also required over the tunnel mouth and on the front edge. The board was set up on two trestles and the end panel positioned to find a new mid-panel fixing point (Hole B). Once roughly agreed, the edge fixing socket (Hole C) was made. This was a piece of 9.5mm brass rod with a M6 hole drilled, tapped and the outside knurled. This was cut to about 20mm long and then Araldited into the prepared hole. After lunch, when the glue had gone off, the end panel was positioned to locate Hole A. A piece of angle iron was sourced and bolted onto the tunnel roof. When fixed, Hole A was drilled and tapped M6. With Holes A & C ready, the end panel was positioned and Hole B drilled. A screw-in M6 fixing unit was fitted and the end panel was successfully tested. 


Masons board

The Bridge board was then set up to transfer the new Hole B to the bridge face. A standard screw-in fitting was fitted and tested. The end panel could now be fitted to both 'End boards'.

Bridge board

It was then decided to complete applying the general yard/road finish. A mixture of filler/plaster, grey grout, brown powder paint and chinchilla dust was made. PVA was brushed over the required areas then the road finish also brushed into place. So much was left over, that any 'earth' areas were also coated. It had just started to dry out as the session finished. We await next week with interest.


Laurence won't be visiting quite so often in future, but we look forward to him dropping in from time to time to keep us on the straight and narrow!


Wednesday 9th November 2022

Worklist:

Make and fit remainder of aluminium tunnel supports.
Review the new factory buildings shell.
Modify the backscene panel.
Discuss the whole site area.

Geoff and Stephen actually started the session not sure what to do. Stephen had been working on new factory building cardboard parts, so the two new boards were set up. Geoff then remembered that he needed to make a third aluminium tunnel support and fit it and the one he'd made last week.


Try out new factory building cardboard shell.


A van in front of the future ground level loading area.


Stephen assembled the various parts of the building and checked for fit, alignment and obstructions. Once Geoff had finished the brackets, serious discussions about the building took place. Geoff made a few comments and suggestions, and then realised that we hadn't given the back scene any consideration, so this was retrieved from storage. This panel (erstwhile having two holes for track) is normally bolted to the bridge board into ferrules fitted into the bridge. In a 6-board format, the panel would be fixed to the 3-track factory board. We needed another hole! The panel was offered up and the new hole marked-up for cutting out, but 'the hole' contained a fixing point. A new fixing point suitable for bridge board and factory was decided and the hole cut out. A 100x50mm timber block was produced to support the panel on the factory board and house the fixing ferrule. It all went well.


The new central hole


New fixing and support post


The corner of the board had to be reinforced with a block to allow the panel bolt ferule in the corner to be fitted. The block was deliberately over-sized to form a base for a pillar for the overhead pipework structure to be planted.


With the buildings sketched out, the purpose of stone works, final building use/style and potential use of yard was discussed in more detail. It was decided that the central gap between the factory and office building would be a full-width vehicle dock with a pair of double doors (for the time being). Stephen then used previously 3D printed pallets and stoneware items to investigate how the yard might be used. Geoff suggested that pallets might not have been widespread in the early 60's, and that crates and straw packing might be appropriate. Some investigation required.


Another productive day.