Wagon development
Cassette jig
Stephen had continued making ore wagons at home and discussed the issues with Geoff.
Self-adhesive card bolt heads had been a great success. Care was needed not to disturb those already in place, but with a bit of care and some appropriate work methods, damage was kept to a minimum. A spray coat of paint sealed them nicely when completed, although Geoff had started to apply paint by brush, as an interim solution.
Self-adhesive card detailing had been great for flat elements, but not those needing folding (angle plates) as they tended to delaminate (plasticard will be used). The end angles will also be made of plasticard, for strength. There were a few gaps in the 'palette' of components at present, but adhoc items were easy to make. Stephen preferred to make-up the sides and then drop a floor in, so remembering not to apply the internal details was imperative. Geoff, so far, has preferred to apply detailing the to sides prior to assembling the wagon - each to his own.
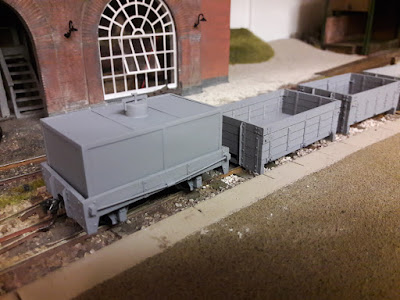
Stephen had also made a wagon he'd taken-to when researching the ore wagon design. The Ceiriog Granite Company was a private carrier on the GVT and notes were found referring to the practice of mixing stone and tar for various uses. The tar was brought in via tank wagon, although no photos were found. A simple design of a modified 1-plank wagon developed, with detailing from other tar wagons, mainly standard gauge. It had given the opportunity to 'finish' the key elements - couplings, underframes and wheels.
Stephen had purchased some M2 nuts & 6mm pan-head bolts. Several nuts had been 'captured' in a strip of plasticard and when cut to length, had been fixed to the wagon floor. The bolts needed to be filed down to 5mm.
However, when assembled and checked against the Kadee coupler gauge, the coupling was 1mm too high. The solution was a 1mm packer under the coupling box and the removal of a 1mm strip from the headstock opening. Geoff will amend his laser-cutting drawings to suit and make new ends. At least the 6mm bolts shouldn't need to be adjusted.
Stephen also had concerns about modifying and assembling the underframes on the wagon floor, ensuring they were aligned properly and dead-level. Although amazed that his first 'proper' attempt had worked so well, a rock-solid process was required. Geoff went into 'production manager' mode and produced two jigs.
The first held the solebar and axlebox sprue in place while assembling, and worked very well, speeding up the process considerably.
He then decided that the underframe assembly would be better if a complete sub-frame frame was formed separately. The second jig allowed this to be constructed accurately and quickly, which also worked well.
However, by now, Stephen had a rake of 8 wagons, with an incompatible floor construction, which required an alternative solution...
Laurence pressed on, making the jig for the cassette safety blocks.
Photo-call - Stephens current set of eight wagons with Geoff's latest 'jig-assisted' wagon on the end.
A three-plank round top wagon far left and two unpainted four-plank round tops add a bit of variety. The first unpainted wagon has card strapping and the others, plasticard.
One interesting and time-saving event had occurred following the last meeting. Geoff had the opportunity to photograph a standard gauge wagon and, in particular, several details that will be of great use. He was also able to answer a question we'd debated - what was the bolt head detail on the internal strapping? The answer was countersunk, which corresponded to the scored circles on the card straps, so NO bolt heads to apply inside!!!


