Wednesday 22nd February

Worklist:
Water supply ducting
Grass
Test some stock

No meeting last week due to various family commitments and no Laurence this week either.

A small amount of work was undertaken together with a lot of pottering around. Stephen progressed the water pipe ducting, staining the casing, gluing in place and adding timber supports. The installation required the removal of some gasifier fittings and the overhaul of the area floor finish by Geoff. Mid-span support (angle-iron), shrubbery and a tap on the isolator valve cupboard will be fitted next time.


Geoff also glued lots more grass strips (pre-made on silicon paper) and some much longer strands, which add some attractive variety.


Stephen wanted to test a 'new' chassis that had been misbehaving on his shelf test track at home, so power and controllers were installed, and the track given a thorough cleaning. This always throws up a few issues like sticky points and minor obstructions and is useful for 'learning' the layout.

The loco in question is an as-new, Bachmann HO GE44 off eBay. It runs well, but had a few issues with speed graduation and running when the controller was off! Stephen suspected some 'DCC ready' electronics might be to blame, but the unit ran impeccably on the ECM controller, so it's down to Stephen's £3.65 Chinese controller!


He also brought along his current project. Whilst researching a railcar to fit on an Ahearn bogie chassis, he came across a 4-w railvan that ran on the Longmoor Millitary Railway (SG).

http://railphotoprints.uk/p242188935/h64531A4B#h64531a4b
A drawing was prepared of a bogie, narrow gauge version ...

... and the bodywork started.


Geoff and Stephen agreed that it would be nice to paint and 'brand' the vehicle in Army colours, to represent a new arrival to the railway. Whilst making this statement, we realised that although we are working on Worton Court (the station), we hadn't actually given the railway a name. An initial discussion ensued, and a few ideas were mooted (CLR, WCR, WCER), but a full compliment of directors obviously need to discuss the matter in more detail.

The railvan chassis is slightly shorter, more sturdy than the one below and has twin flywheels. In due course, this chassis will provide the base for a railcar. For £20 each, both run incredibly well.


All three loco's came ready-fitted with Kadee couplings, which was handy.


Wednesday 8th February

Worklist:
Wiring repairs and associated remedials
Track painting
Tunnel lining
Board prep and paint sourcing

Unfortunately, an incident on the M3 meant that Laurence was unable to make the session. Geoff and Stephen pressed on....

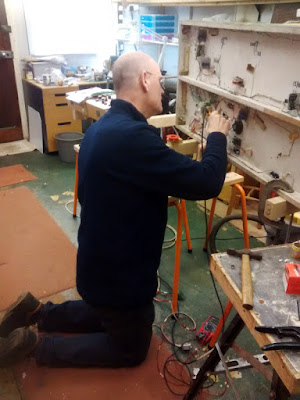
Instead of setting up the full layout on the trestles, Stephen requested that one of the main boards be clamped upright on two trestles to allow assessment and repair of some electrics to be carried out. A couple of wires feeding voltage reduction units had broken off, but attempts to strip the ends showed that the wire was very brittle and both sheath and wire broke easily. The only answer was to re-wire all four of the units (2 sets of lights, the gas engine and sound unit).

The platform board ready for wiring repairs
Stephen in his unusual working position.
The Tangye sound track that was thought to have been accidentally erased was still intact, and worked nicely. The new electric motor unit for the gas engine failed to work until we realised that the power supply had to be reduced from 13v to 6v to run at all. It was then trimmed to 5.2v to get the tick-over of the engine to synchronise with the sound unit.


With the board upright, Geoff kept finding areas of track and scenery that had not been fully painted. Once the platform board was finished, the bridge board was similarly clamped, and missing paint applied. Stephen took the opportunity to apply a layer of plaster to the interior of the bridge.

Geoff painting rock-faces and rail edges

Whilst Geoff worked on touching-up paint on the yard board, Stephen worked on the baseboard fascia, which had sustained some damage. Commenting that the layout fascias needed to be painted, a search of the workshop/garage turned up a tin of grey undercoat left over from the narrow boat. A flurry of hole filling occurred, so that the repaint could be progressed next week.


Geoff getting very 'arty' with the photography!


Wednesday 1st February

Worklist:
Weathering paintwork to line-side fence
More grass
Paint wire fence
Water supply ducting
Water tank
Crane detailing

After the previous weeks running session, it was catch-up day, with each reminding themselves what jobs they had on-the-go.

Geoff mixed up slightly different batches of acrylic paint and 'weathered' the line-side fence. He then applied more grass around the fence post bases, to hide any glue remains. However, the grass, while acceptable, just wasn't standing up as the demo, which was still baffling. Laurence reported that boosting the power supply from a 9v battery to 12v transformer had been described in a current magazine as far more successful, but Geoff was sceptical. An approach to the manufacturer/supplier was mooted.

Geoff had always been critical of an adjacent point, where a section of rail had been used to hold the tie-bar of a point down (a common failure of John's pointwork). "One bit of rail just isn't prototypical", so some more were added nearby.


Grass fibres standing up well on this occasion.

What happened to the fishplates?
Stephen's task for the day was to take the shine off the wire fencing had recently installed. A delicately applied coat of mid-grey acrylic did the job, albeit slowly.

Painted wires on the left - shiny original finish on the right.
He then moved on to progressing the timber trunking for the water supply to the gasifier equipment. Serendipity raised it's head when the previously assembled timber unit broke while the timber board joints were being scribed. The two pieces were much easier to work with and were re-glued when finished. Support timbers were cut to size ready for assembly - next week. Geoff took the opportunity to glue the water tank itself onto the brick base. This is one of John's original scratchbuilt features and is beautifully detailed. From the back, half of the original base can be seen - the other half used to be on the next board, and the tank swivelled into place to disguise the board joint. Now we are using a fence and scrub.


Laurence continued to work on the yard crane. To recap - it is a white-cast metal kit of a steam powered crane, but is short of operational (rotation) details. A large gear wheel has been made and the winding mechanism is reaching an exciting stage....


A work session without us foraging on the floor for something Laurence had dropped was rare, and this week was no exception. The spur gear that engaged on the base gear (seen above), nose-dived onto the floor - "2mm dia. and steel" - shouldn't be a problem. All tried to find it on hands and knees, then a large magnet was swept over the whole area. We decided to break for lunch and try later. As we stood up, there it was, on the workbench - 4mm dia. brass. Say no more!

TO DO - As the layout inches towards 'completion', the outstanding items get discussed more. Two buildings need finishing - the main warehouse and the workshop. Some electrics serving on the gasifier building have been damaged and need to be repaired. The Tangye engine sound unit has been wiped and needs refreshing. Stephen now has the sound track on his phone, in readiness.